Google Adsense
How to use Google Adsense with QuickCreator Blog Builder
Google AdSense is a popular advertising solution for publishers who want to add additional streams of revenue to their content. It is a free platform which unlocks the ability to place customisable advertisements across your site and get paid when ads are seen or clicked. Getting started with AdSense involves injecting code into your QuickCreator blog, either using the code injection tool, or for more fine-grained control, in your blog’s front-end. Here’s how to get started with Google AdSense!
1. Sign up for Google AdSense
Head to AdSense and use a valid Google account to get signed up. Initially, you’ll have to enter some details such as a valid address so that you can get paid, your domain, and some personal details. Once you’re in, you will then be given a code snippet which you can use to get your first ads up and running.
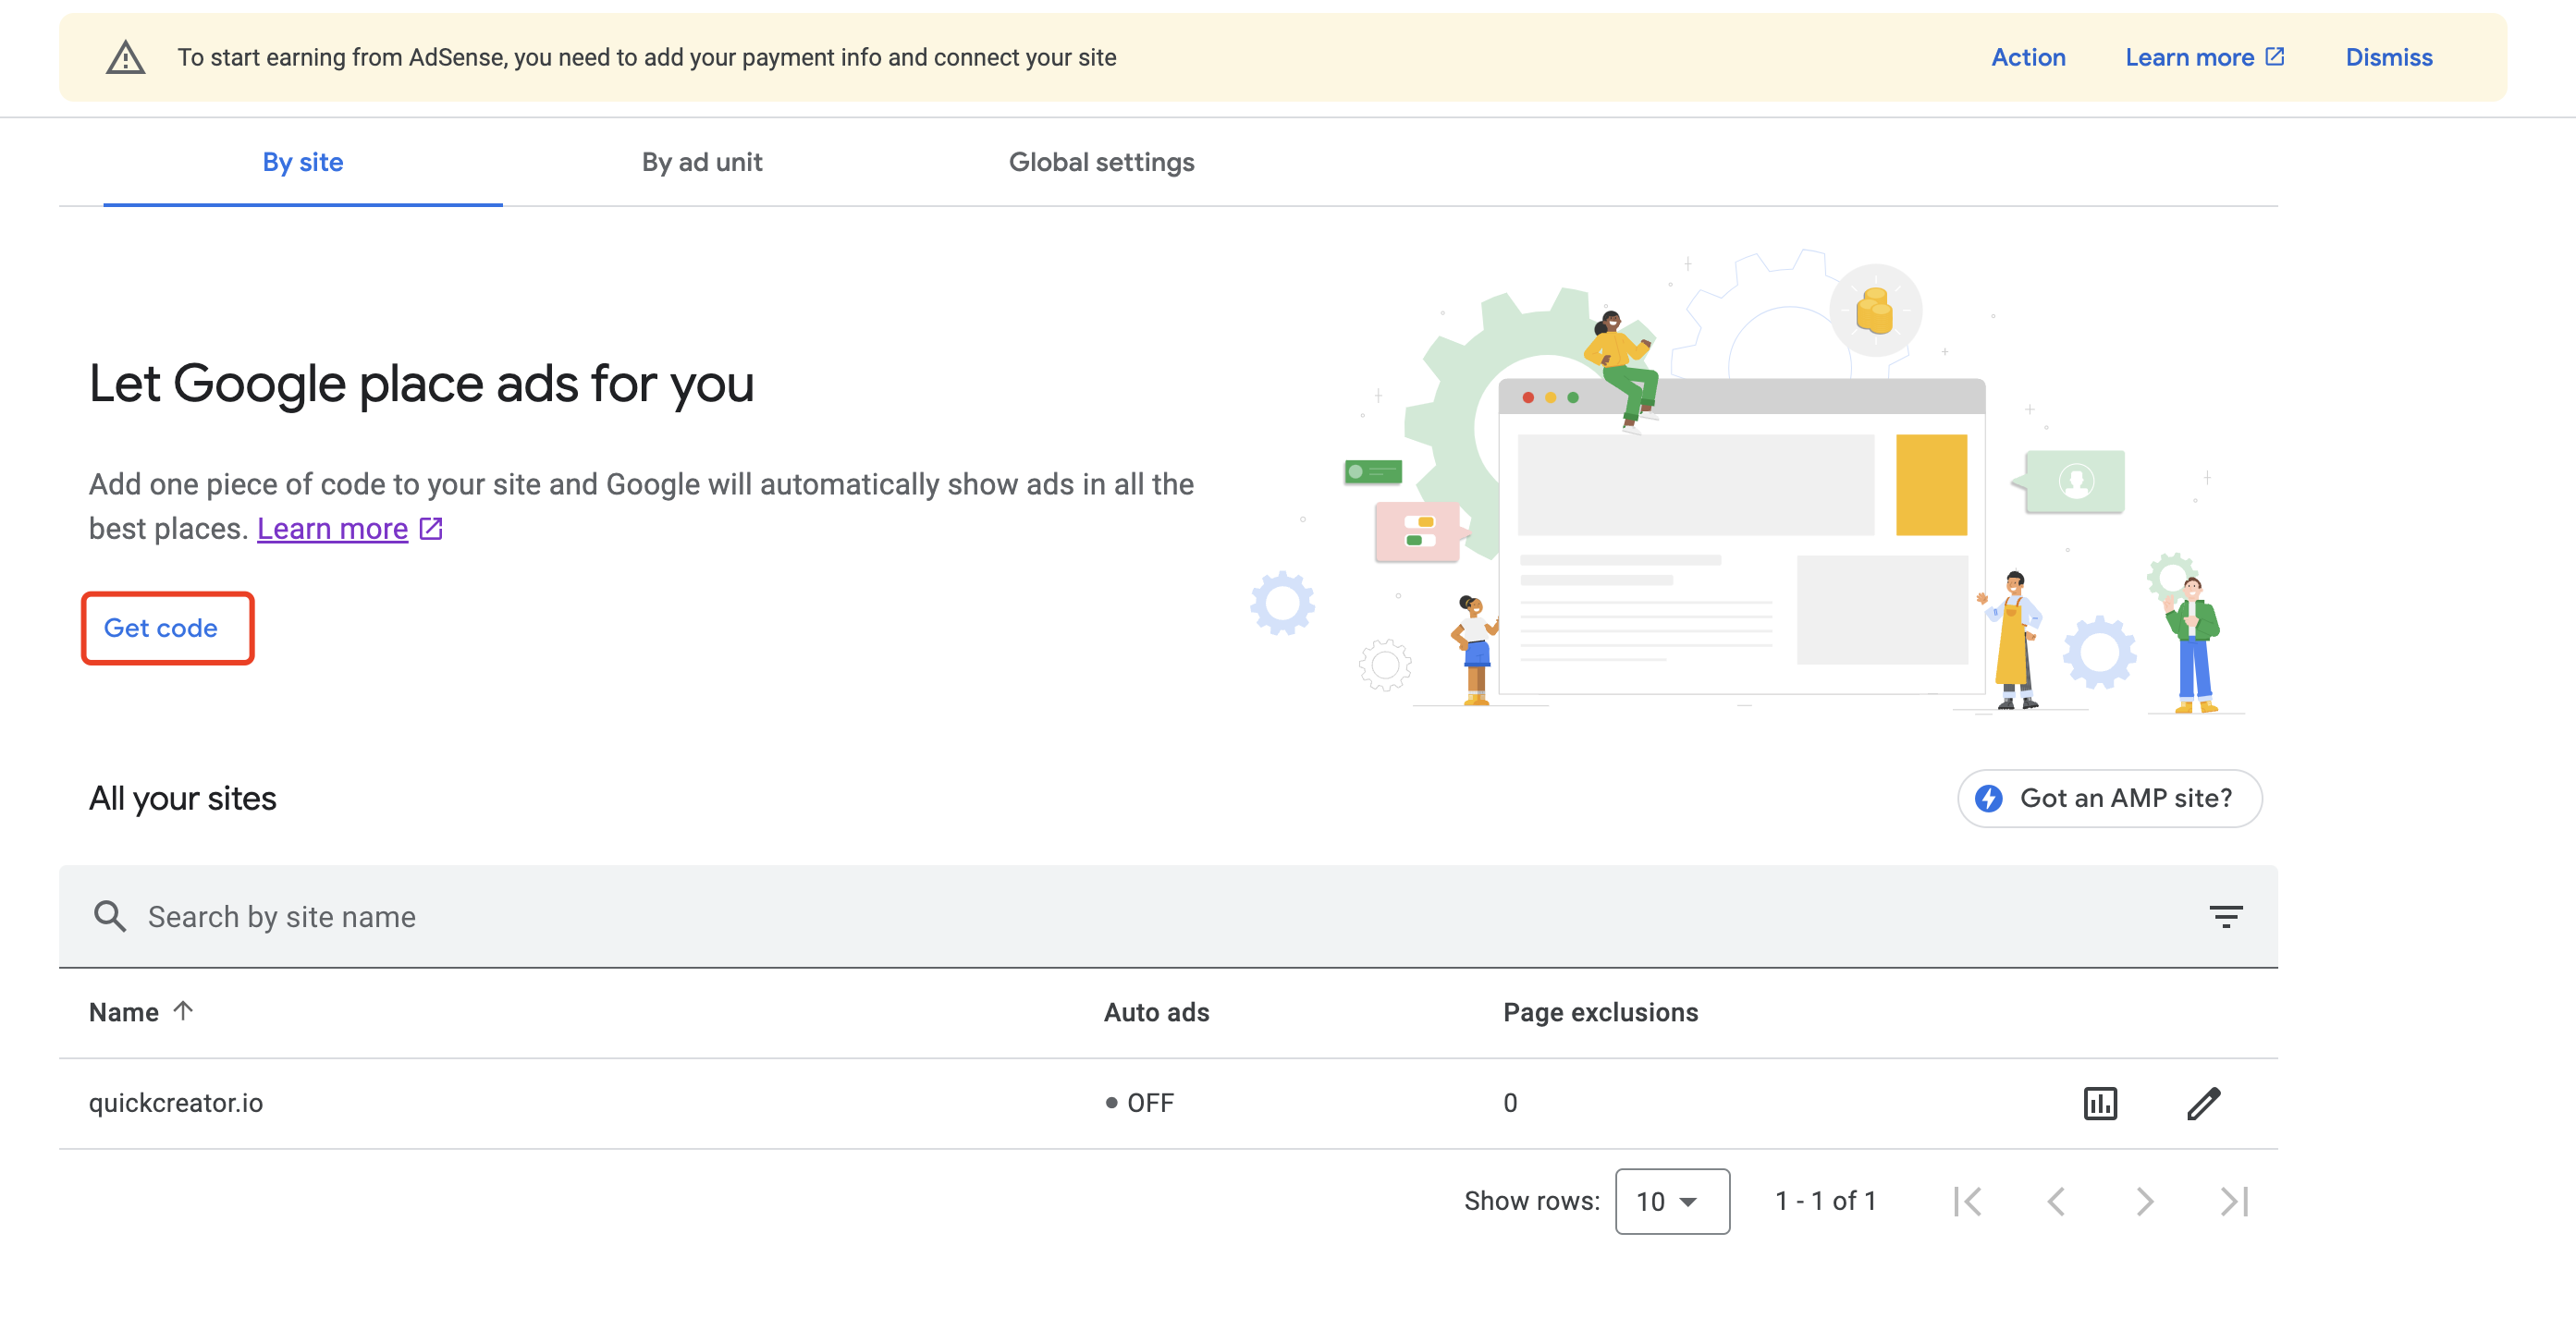
2. Grab the Auto ads code snippet
If you want to get things set up in the simplest form - you can use the Auto ads code snippet (which is provided at setup or can be found in your account):
This code is intended to be used across your site and should be placed between the
and tags, which you can achieve in QuickCreator via the site header code injection feature: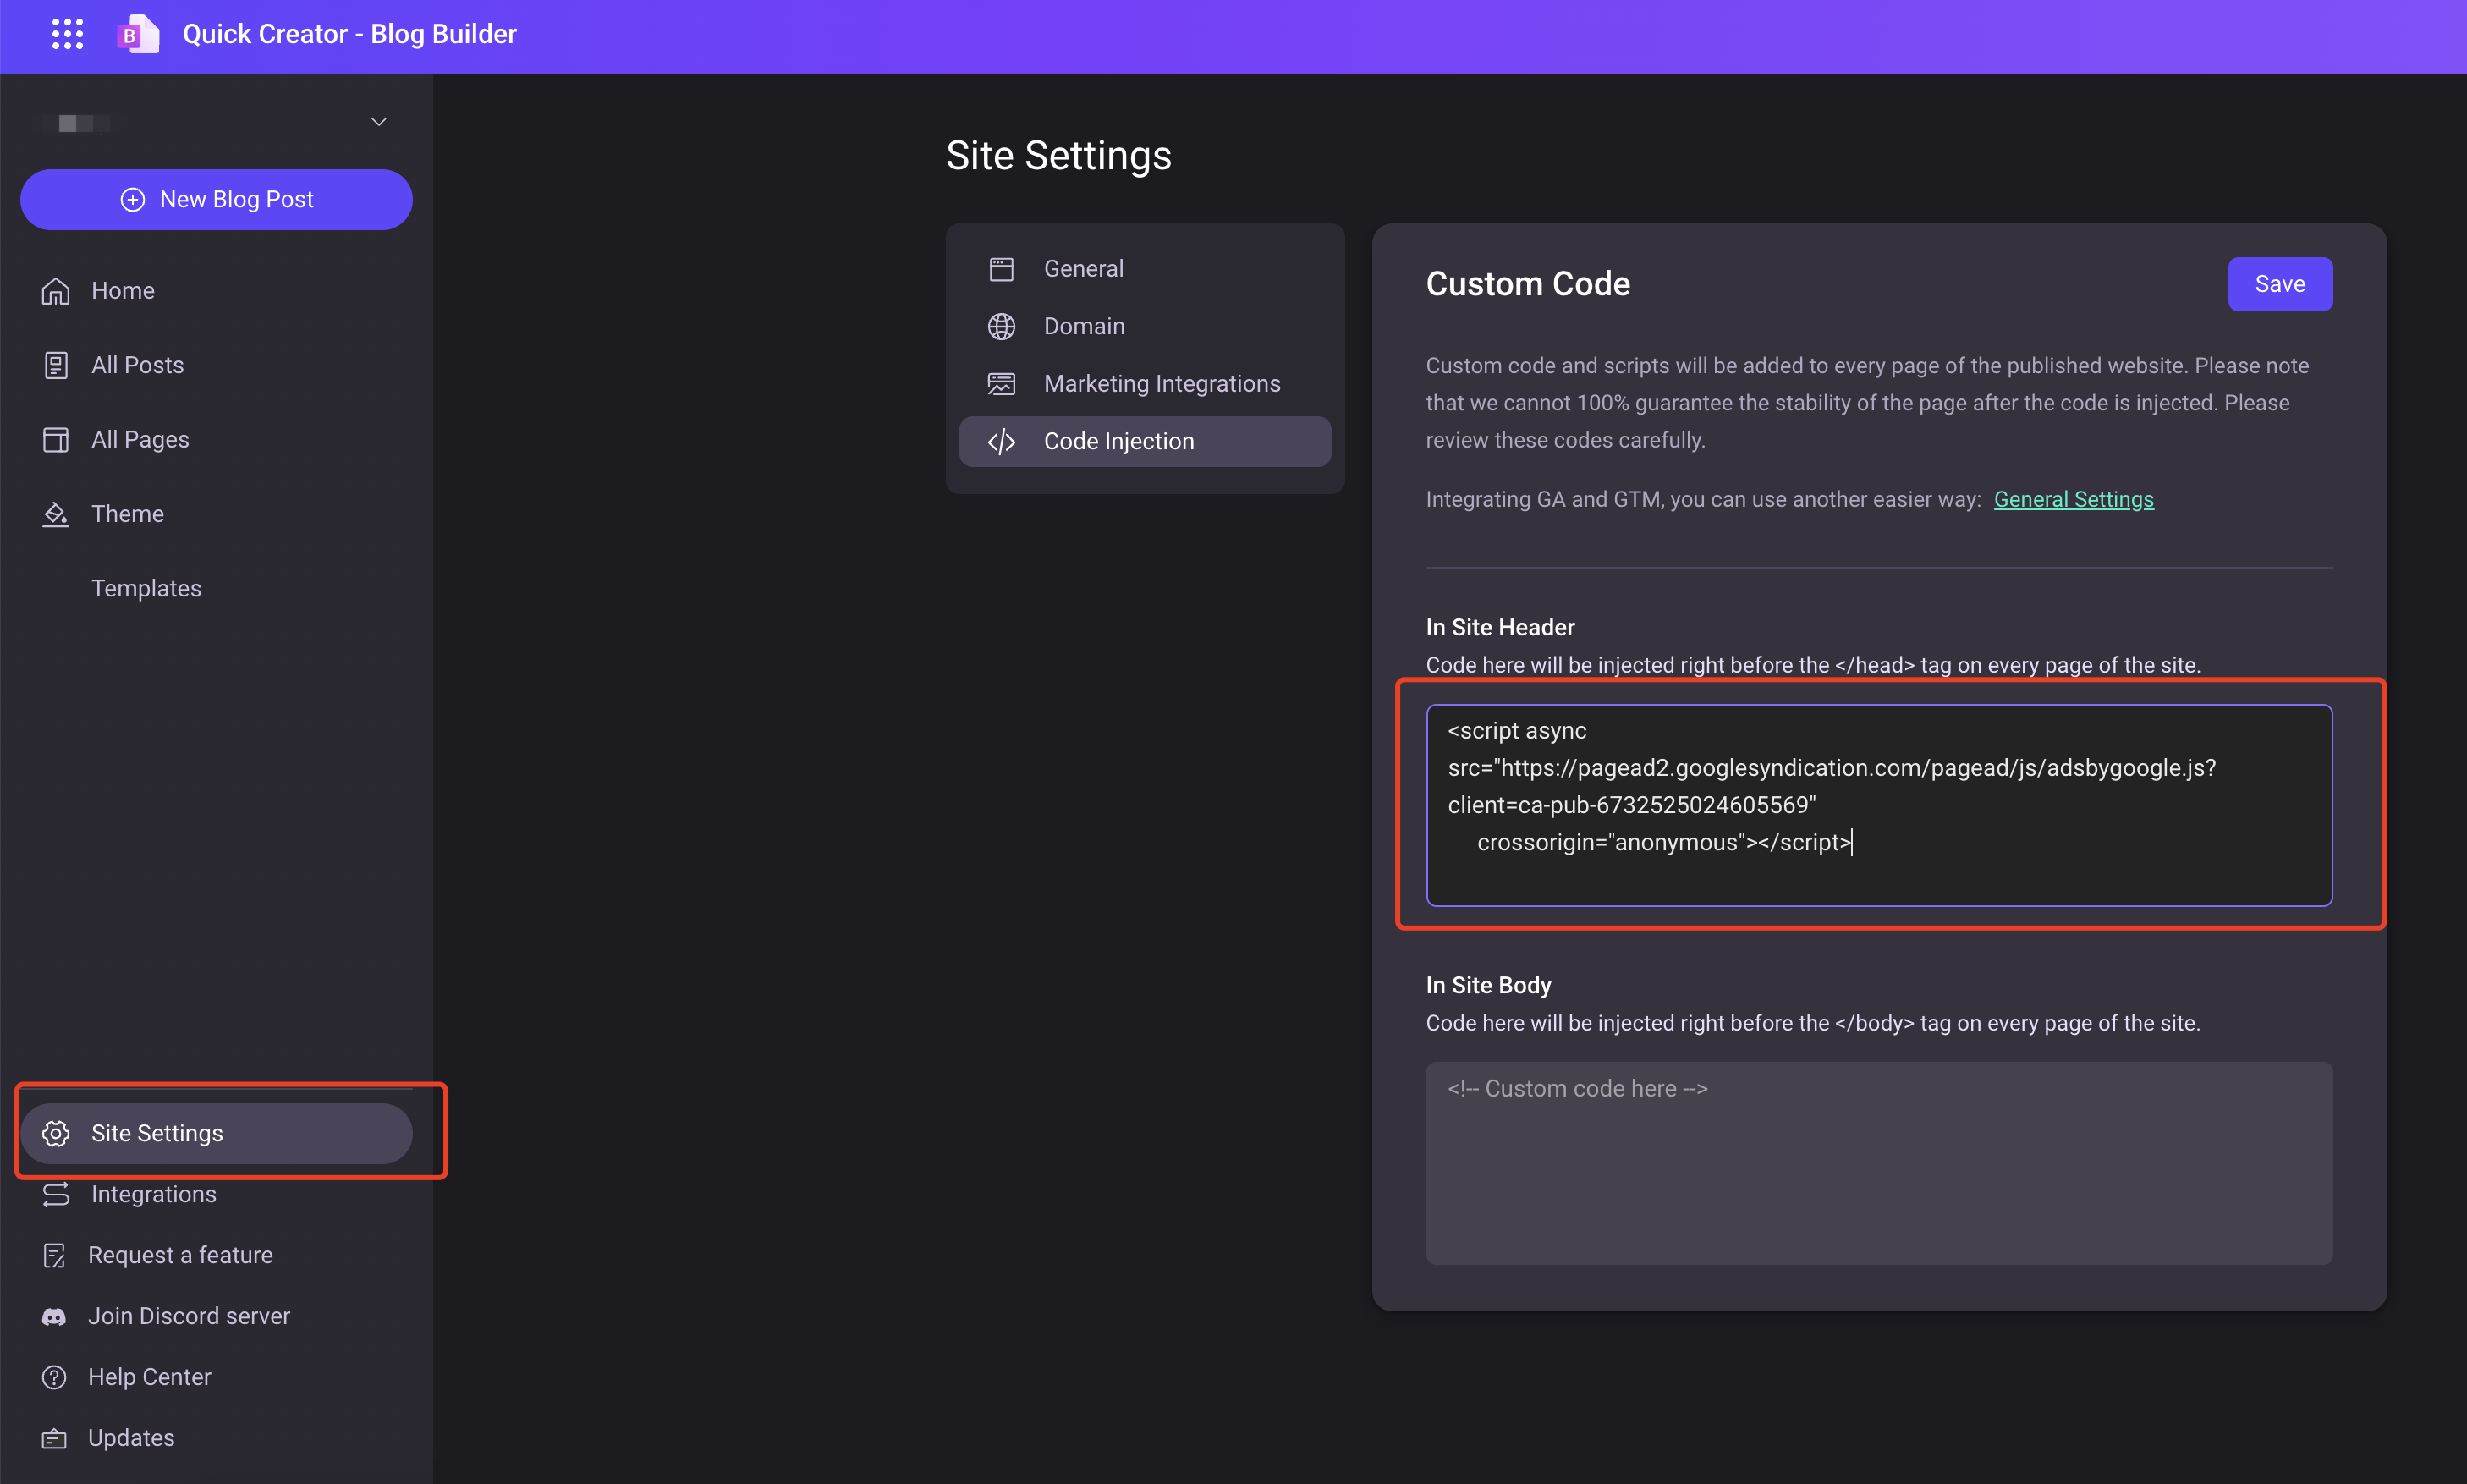
3. Display ads in specific areas of your site using Ad units
The more likely outcome is that you would like full control over the placement of your AdSense ads. There are several ways to achieve this using Ad units in AdSense. Ad units can be created in your AdSense account and unlike Auto ads, they are designed to be used on specific pages and placed within the
and tags. Once you have created a new Ad unit, copy and paste the code: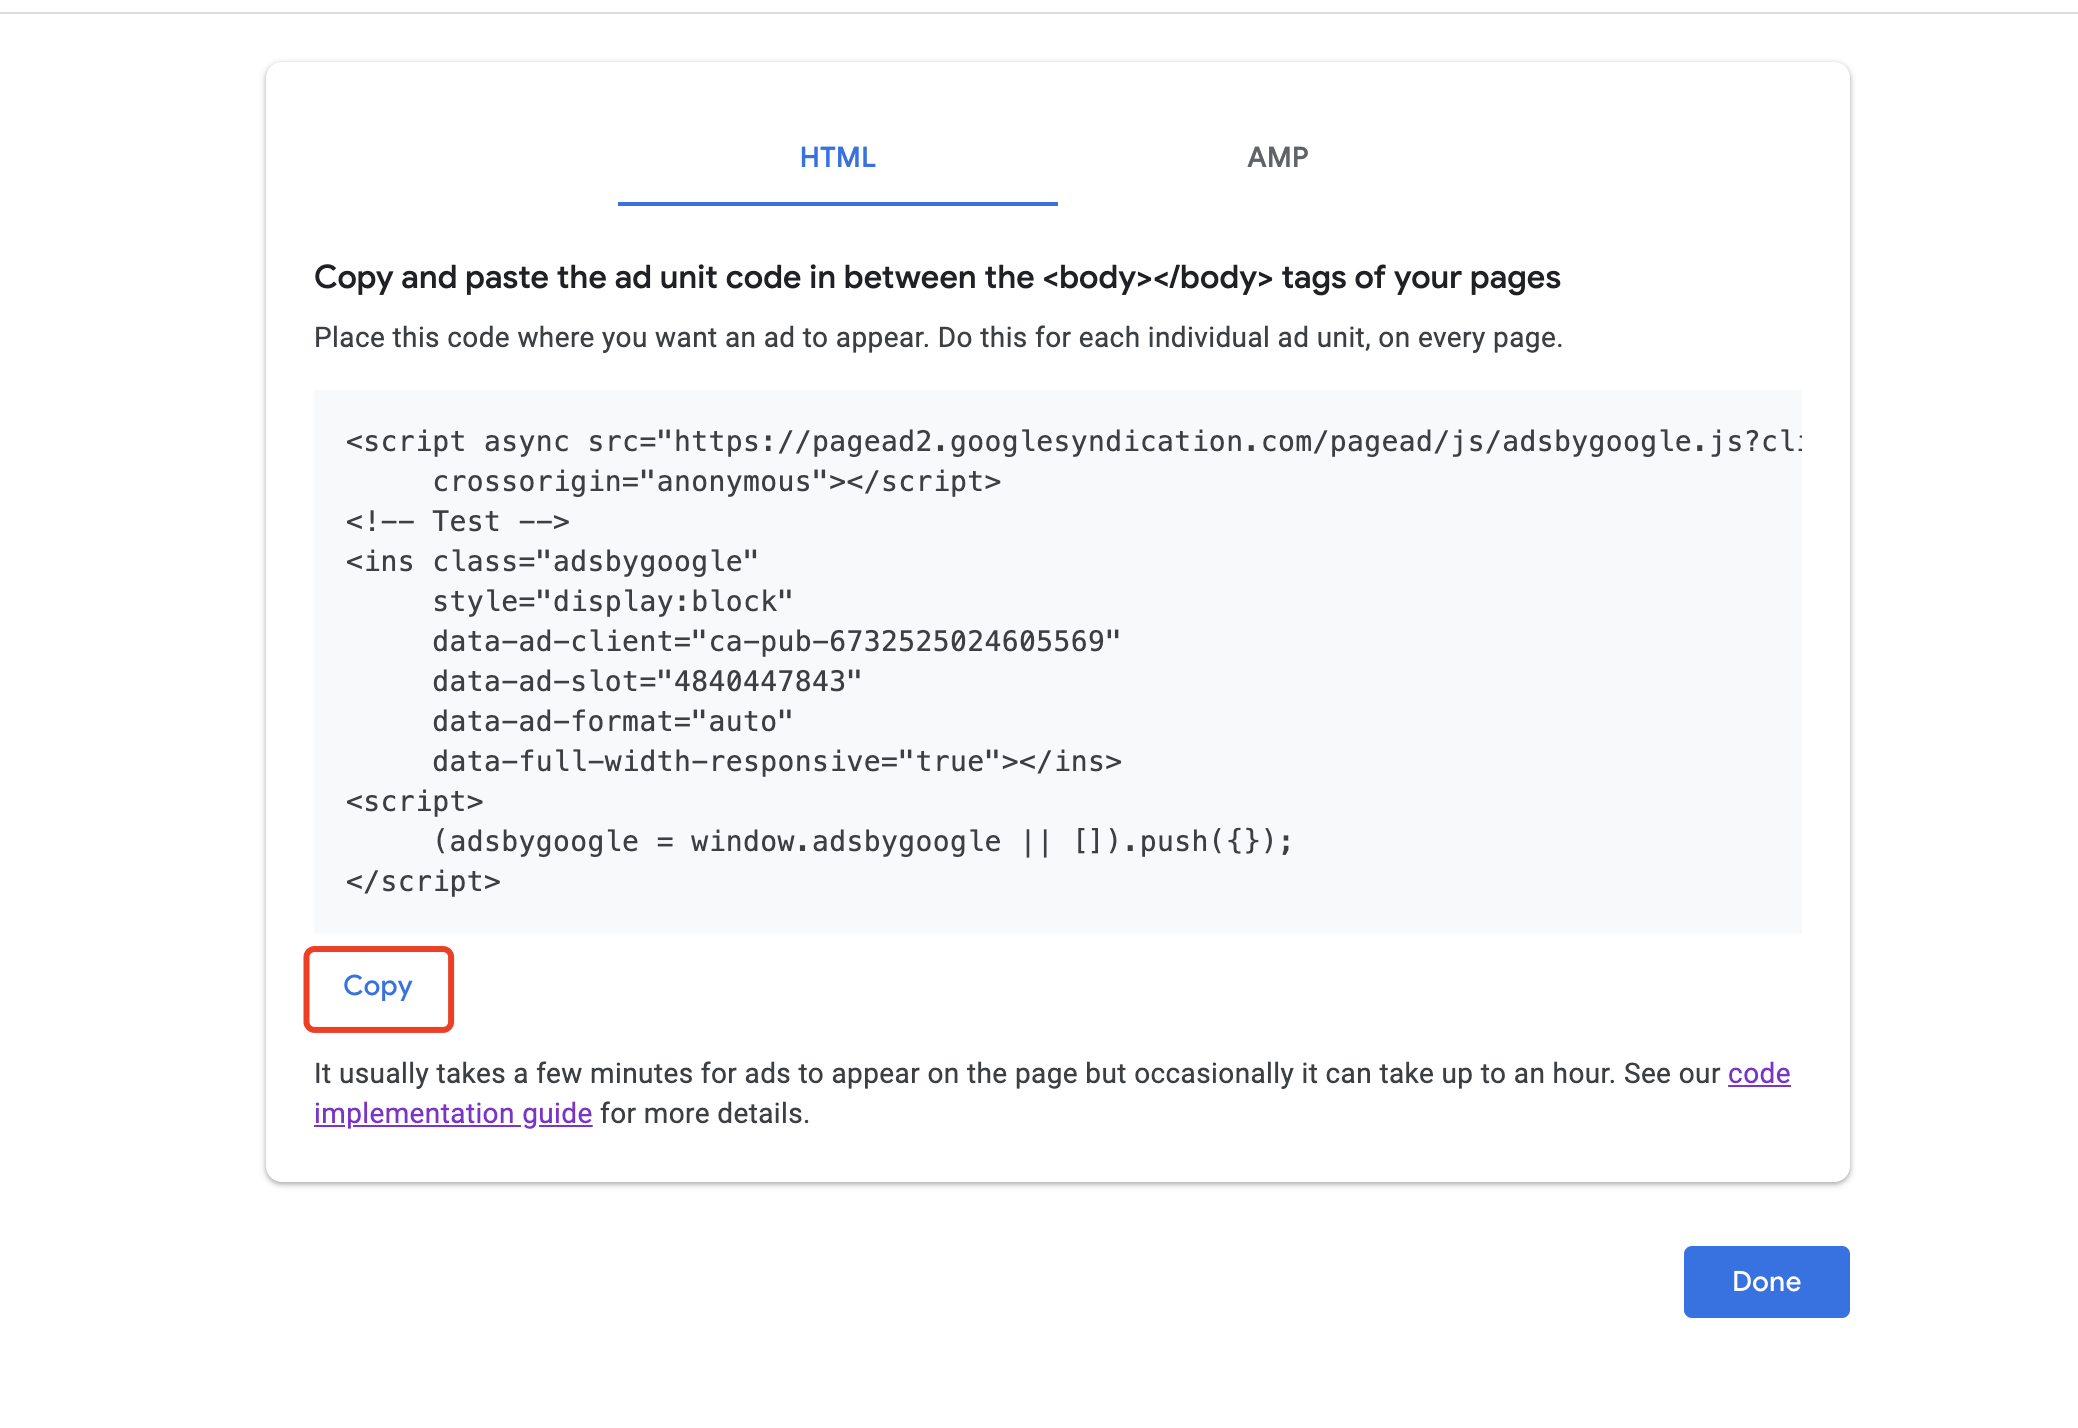)
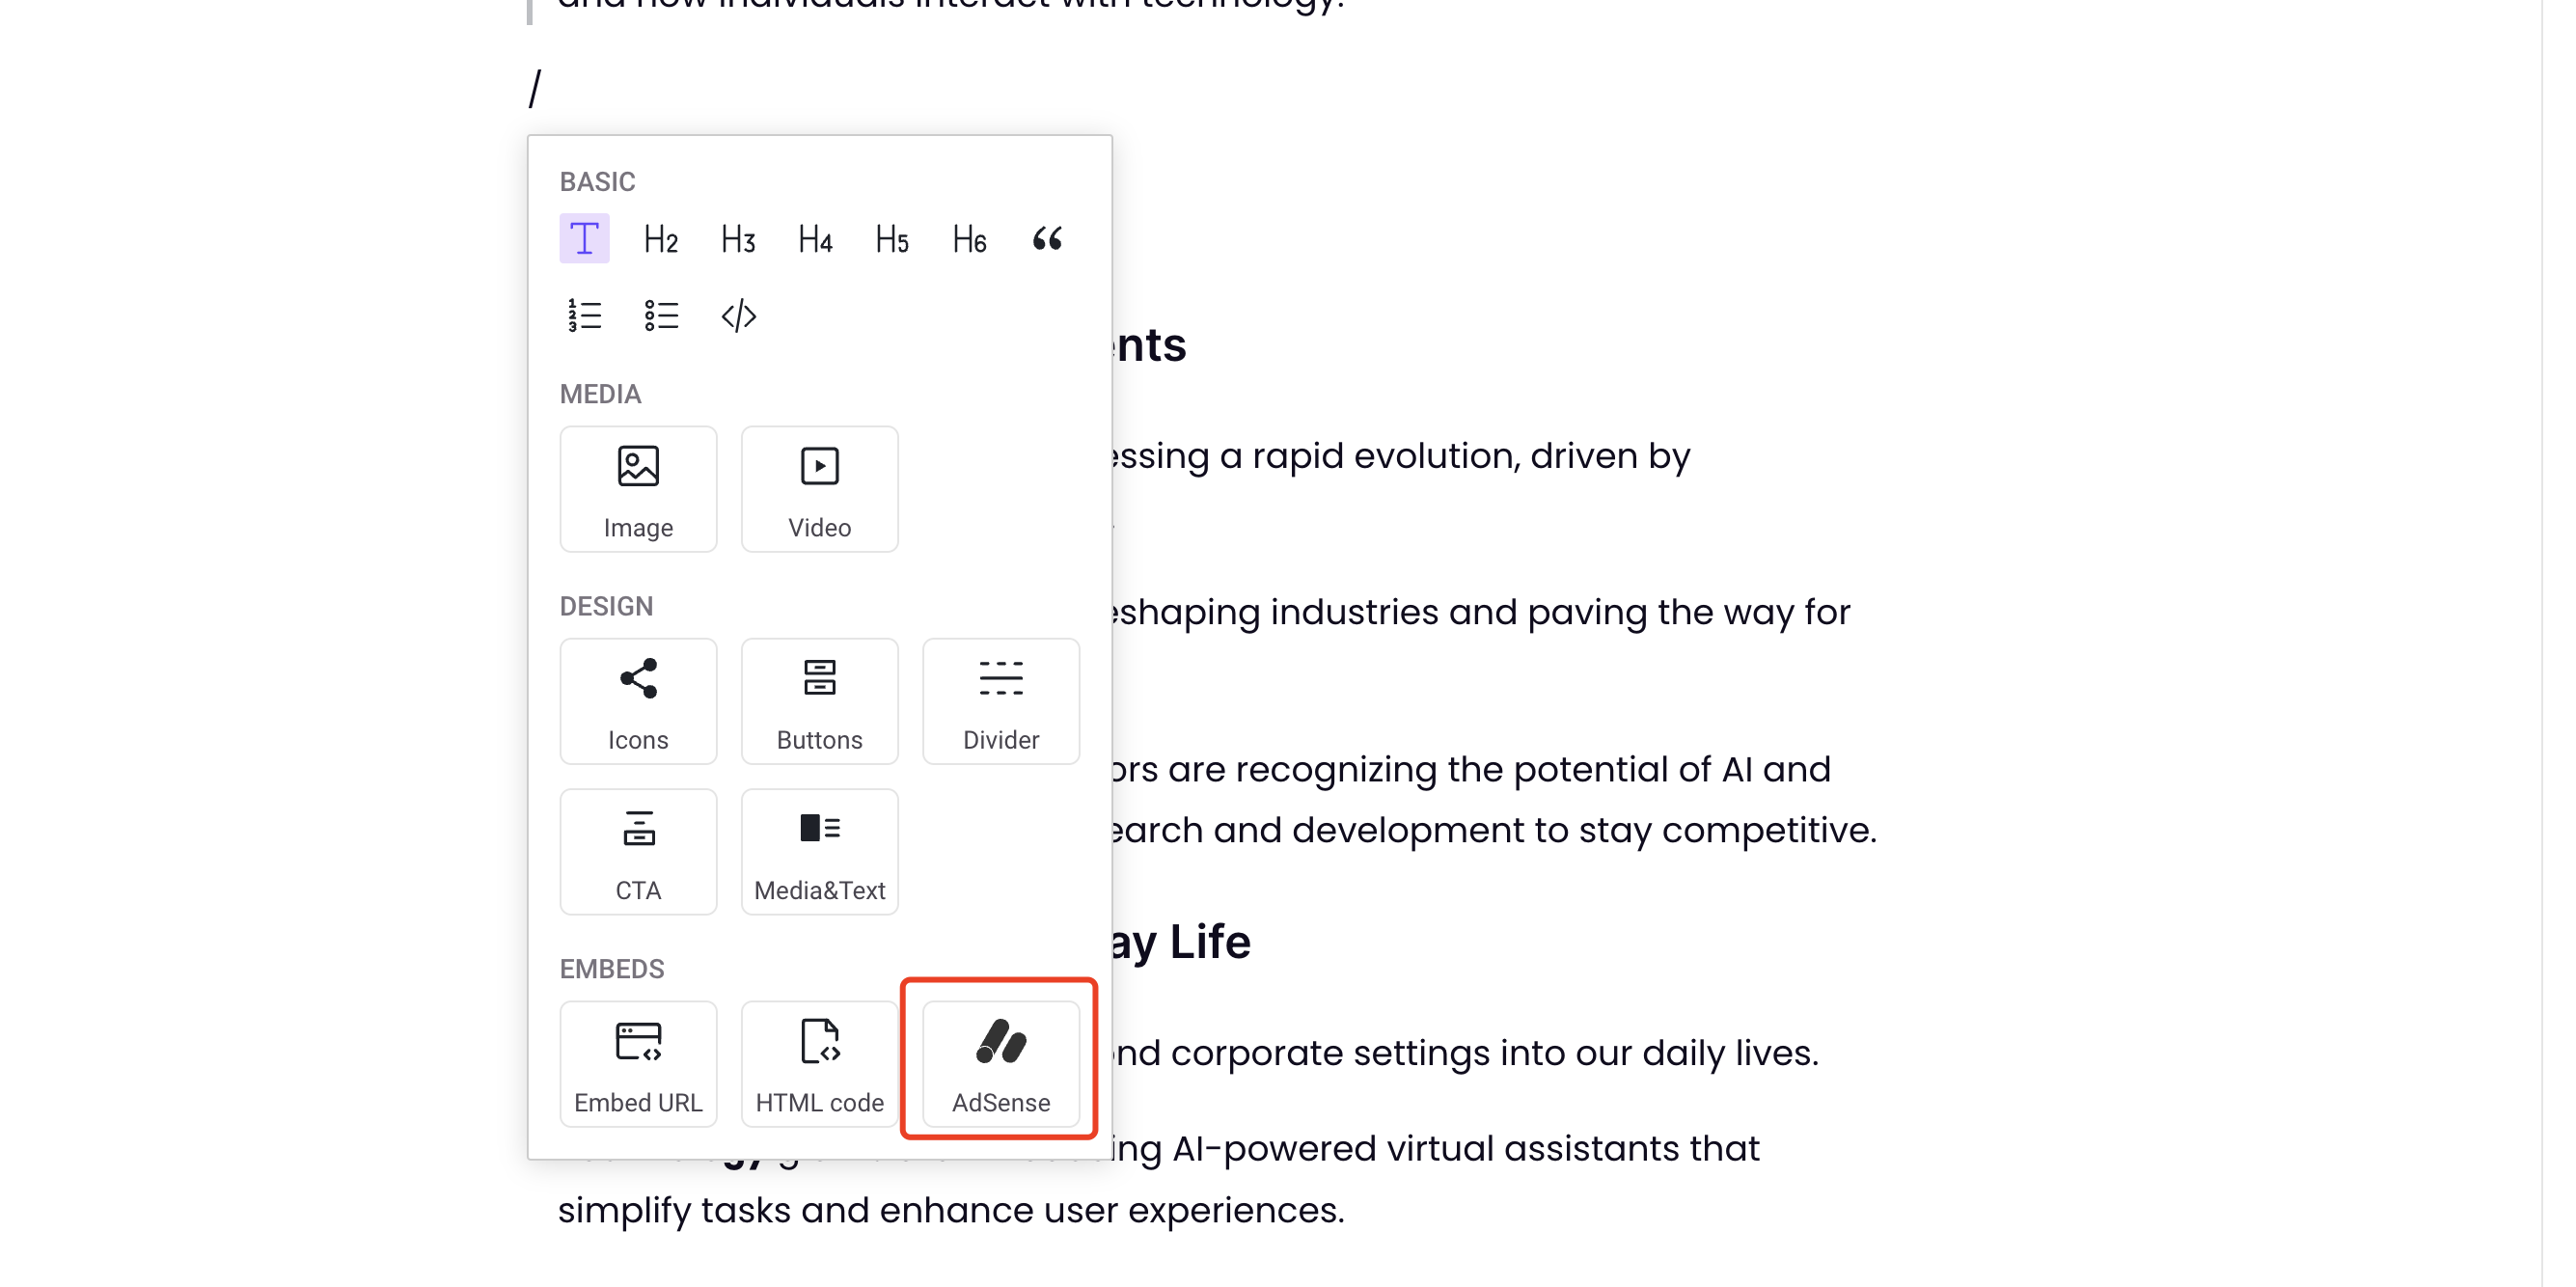
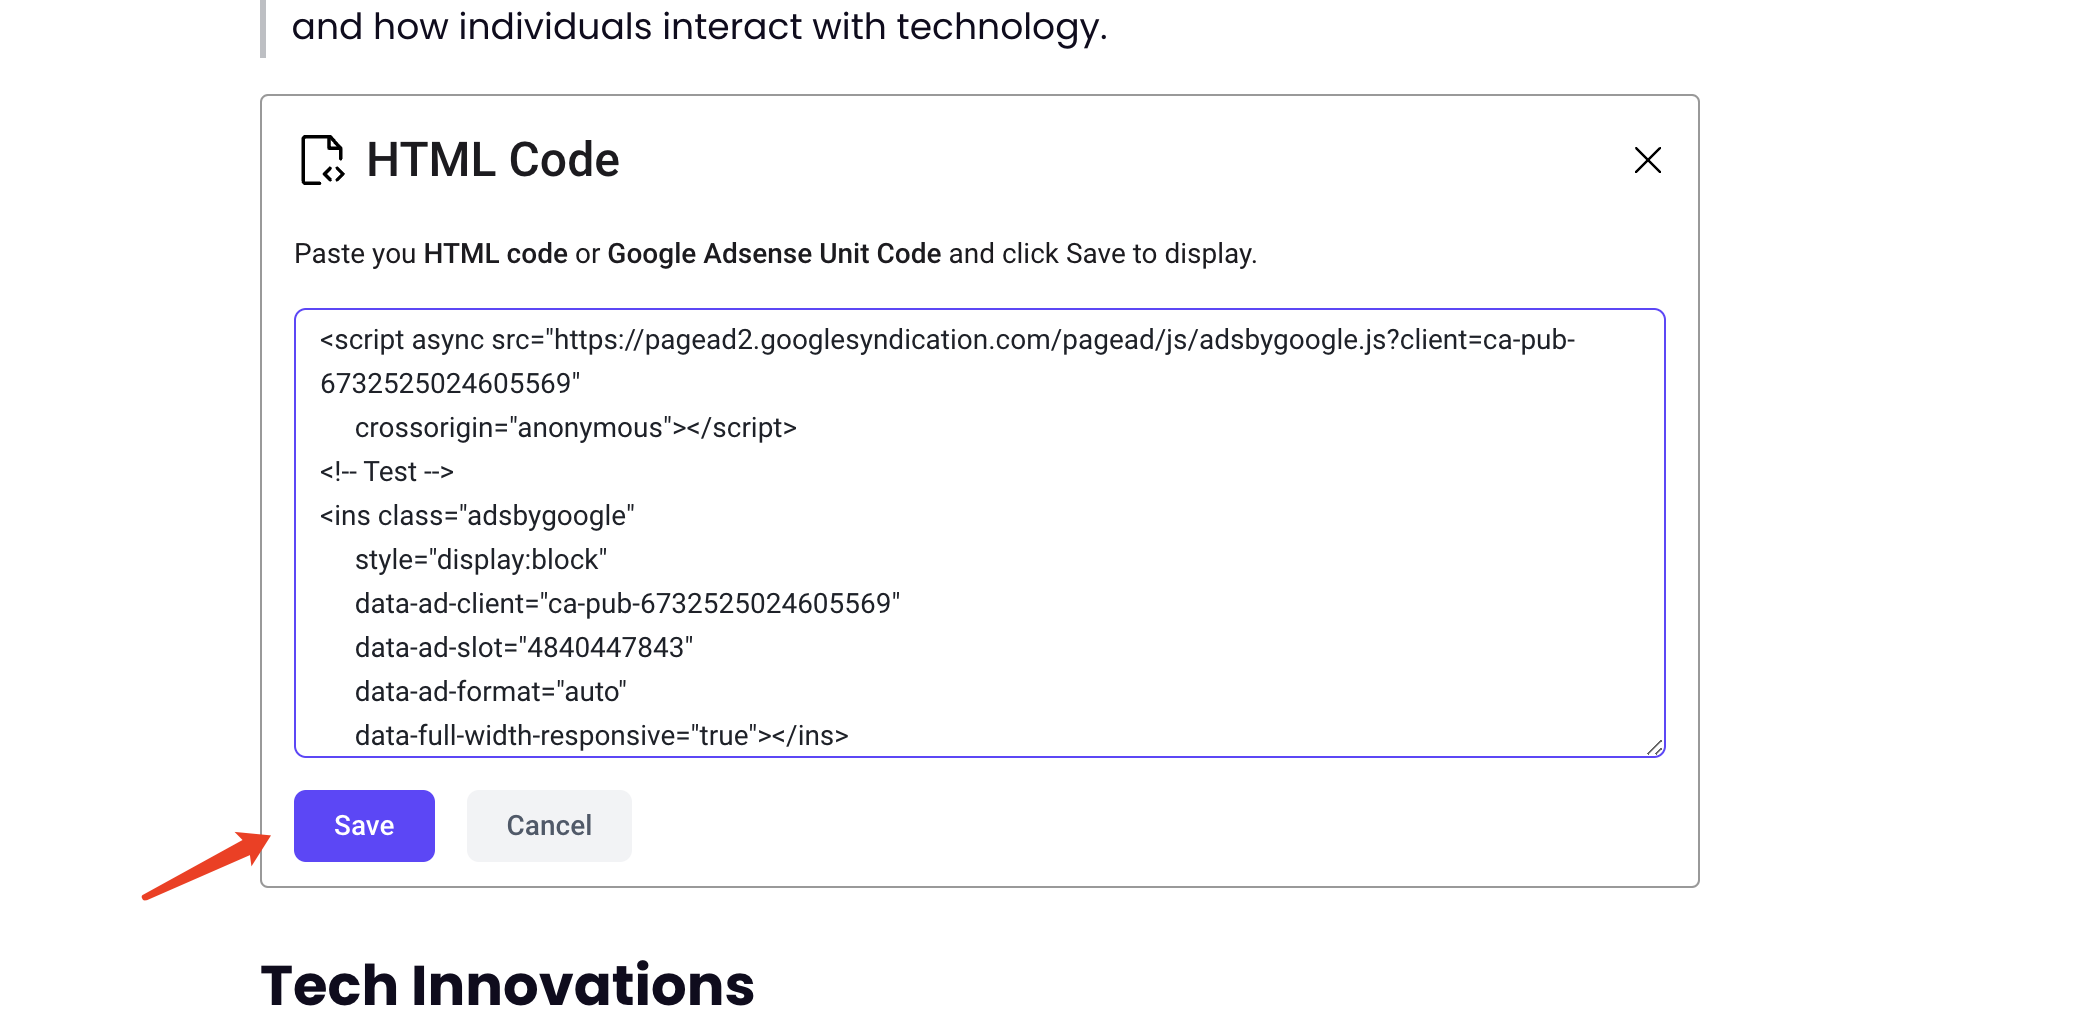
If you want to display ads on a specific post or page where the content exists in QuickCreator, it’s possible to use an HTML card within the editor to display ad blocks in-line with your content:
Paste the code, and click "Save":
4. Implement your AdSense code
Whether you’re using Auto ads where Google AdSense decides where to display the ads, or Ad units where you determine where your ads appear, once you’ve implemented your code in any of the ways shown above, you’ll start to see the ads appearing within a couple of hours. All ad customisation, such as determining which ads are shown or to apply other advanced features such as Custom Search Ads, can be done within the AdSense dashboard. Find out more about how to customise your ads using the AdSense help resource.
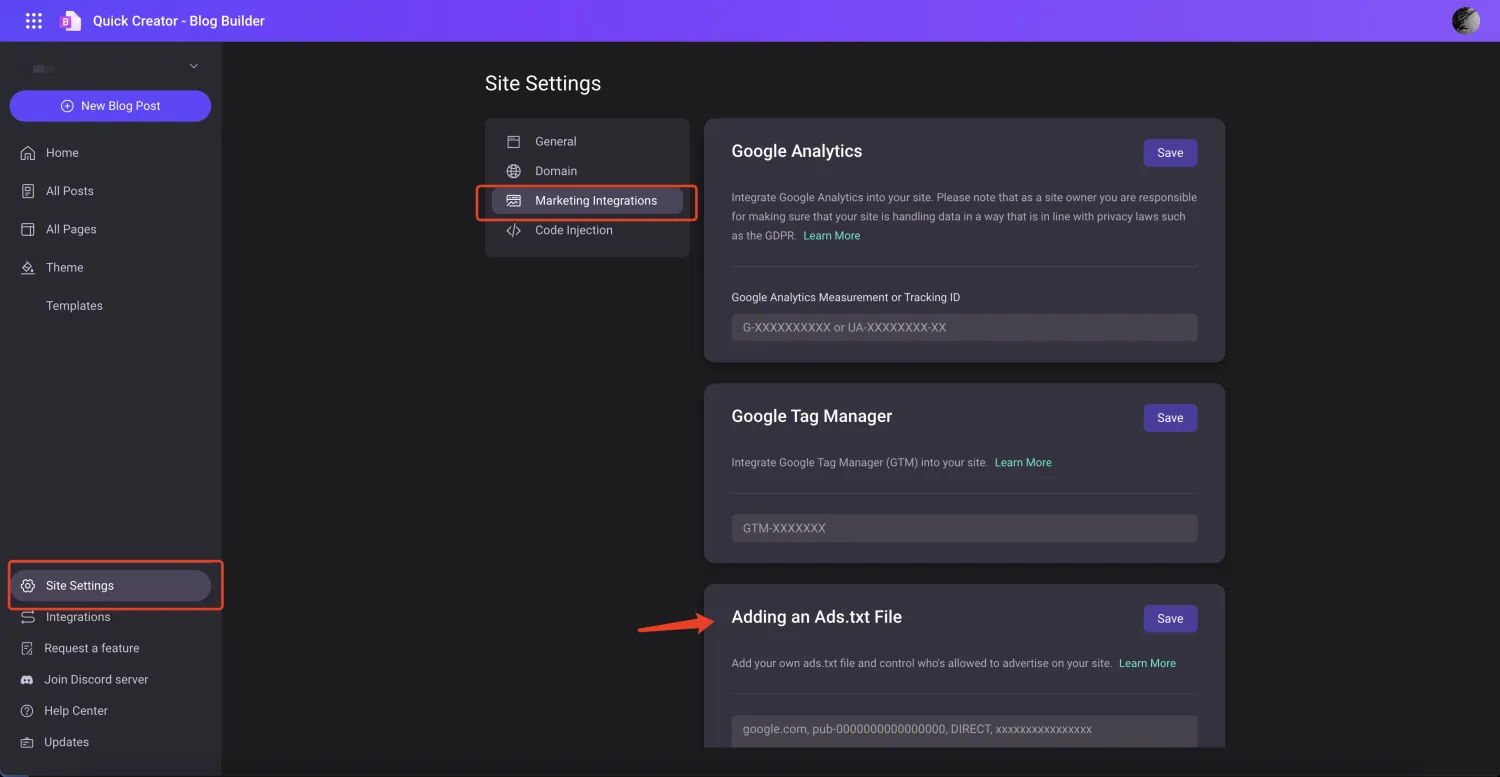
5. Upload an Ads.txt file
In some scenarios, you may need to upload your Ads.txt file to QuickCreator. You can find it in Site Settings > Marketing Integrations: